 At Home
The Switch-over
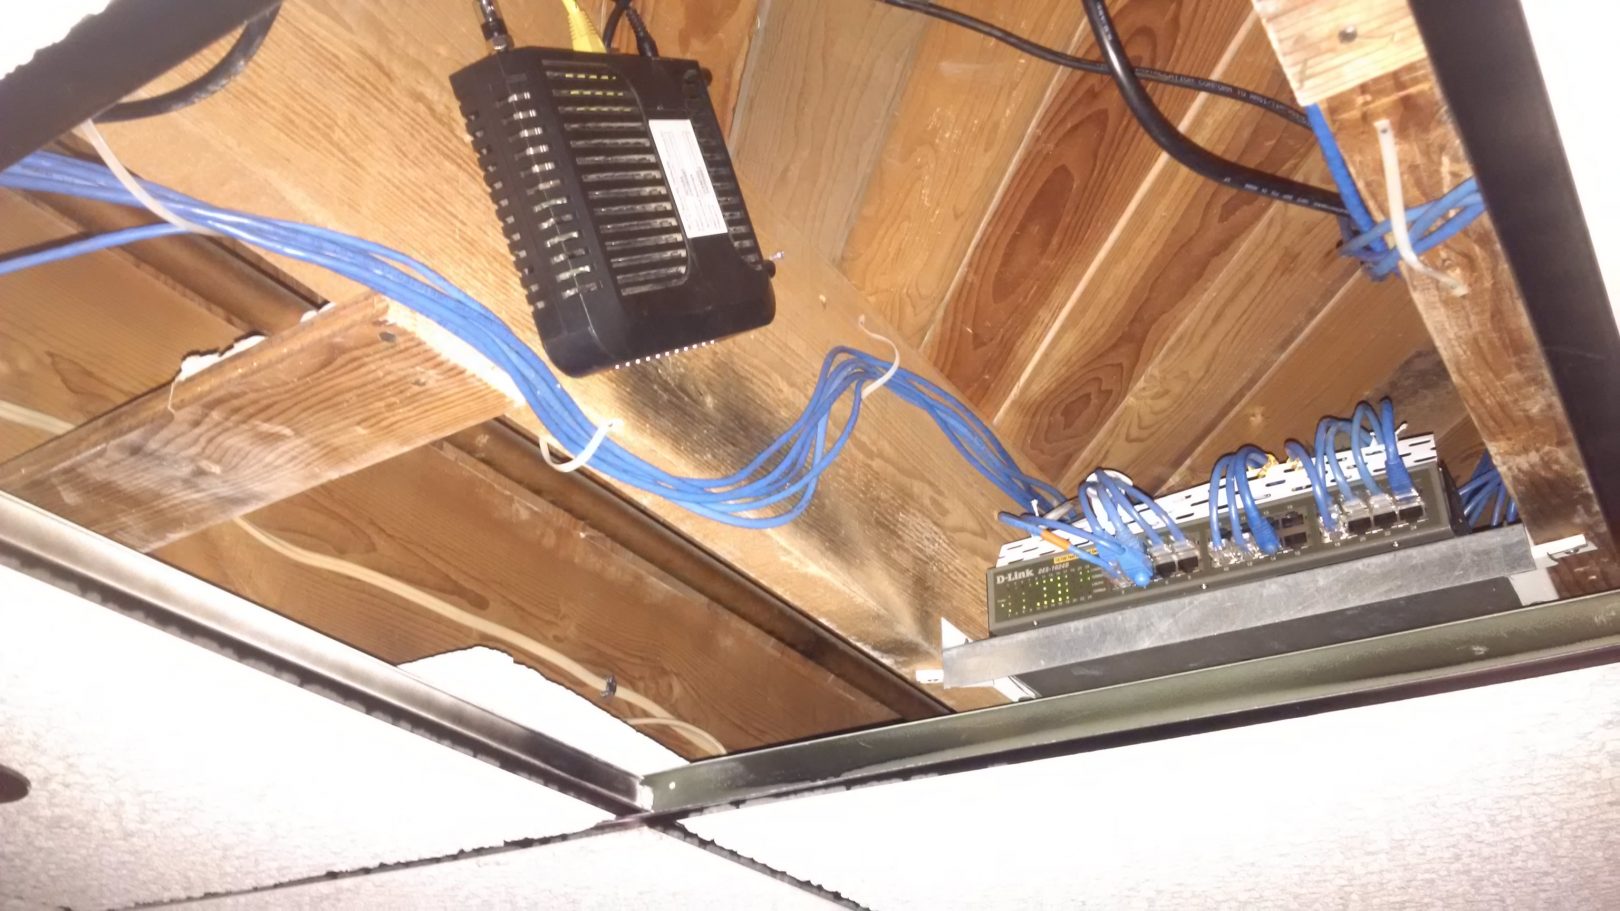
My home network has evolved over time, in fits and spurts, into the less than simple cabling adventure that exists throughout the house today. Mine is mostly hard-wired, as I prefer the reliability of cabled networks, wherever possible, over the slew of wireless devices, of various capabilities and drawbacks, sprinkled about the corners of most living arrangements.
Pulling the cable from room to room and arranging it in a way that doesn’t offend the eye takes a degree of effort and foresight, which develops only as hindsight, so what you see tucked unobtrusively into the ceiling tiles in my basement, has been done, and re-done, then done again, with each effort to better results. There is lots to learn, not the least of which is how to build a professional looking cable, of which there are only now a few.
As the network grew, I eventually came up against the hard wall of capacity. What started with the 4 ports on the back of my router, and became 4 + 8 with a Netgear switch, are now all full, and replaced with a 24 port D-Link switch. The problem, of course, was how to shoe-horn that into the space without having to completely renovate the entire project from scratch.
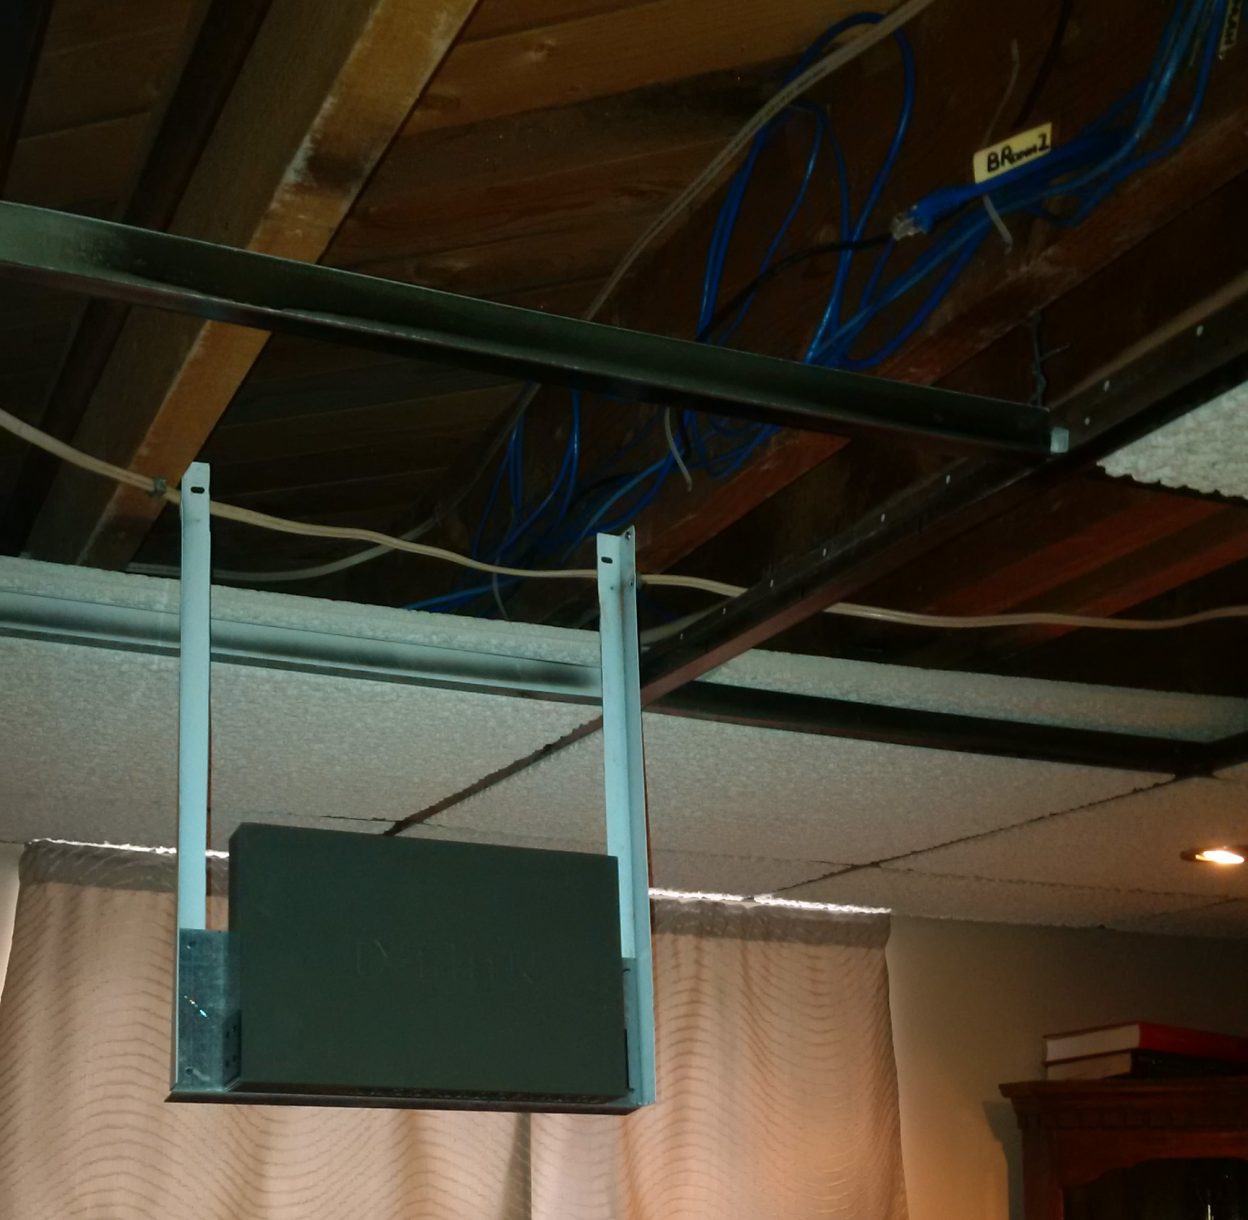
I don’t know exactly when the light bulb went off, but it did, so I didn’t argue. I made a “swing arm” to mount the switch in the ceiling, and the rest followed from there. I can pivot this down to work on it when needed, and tuck it up into the ceiling once done.
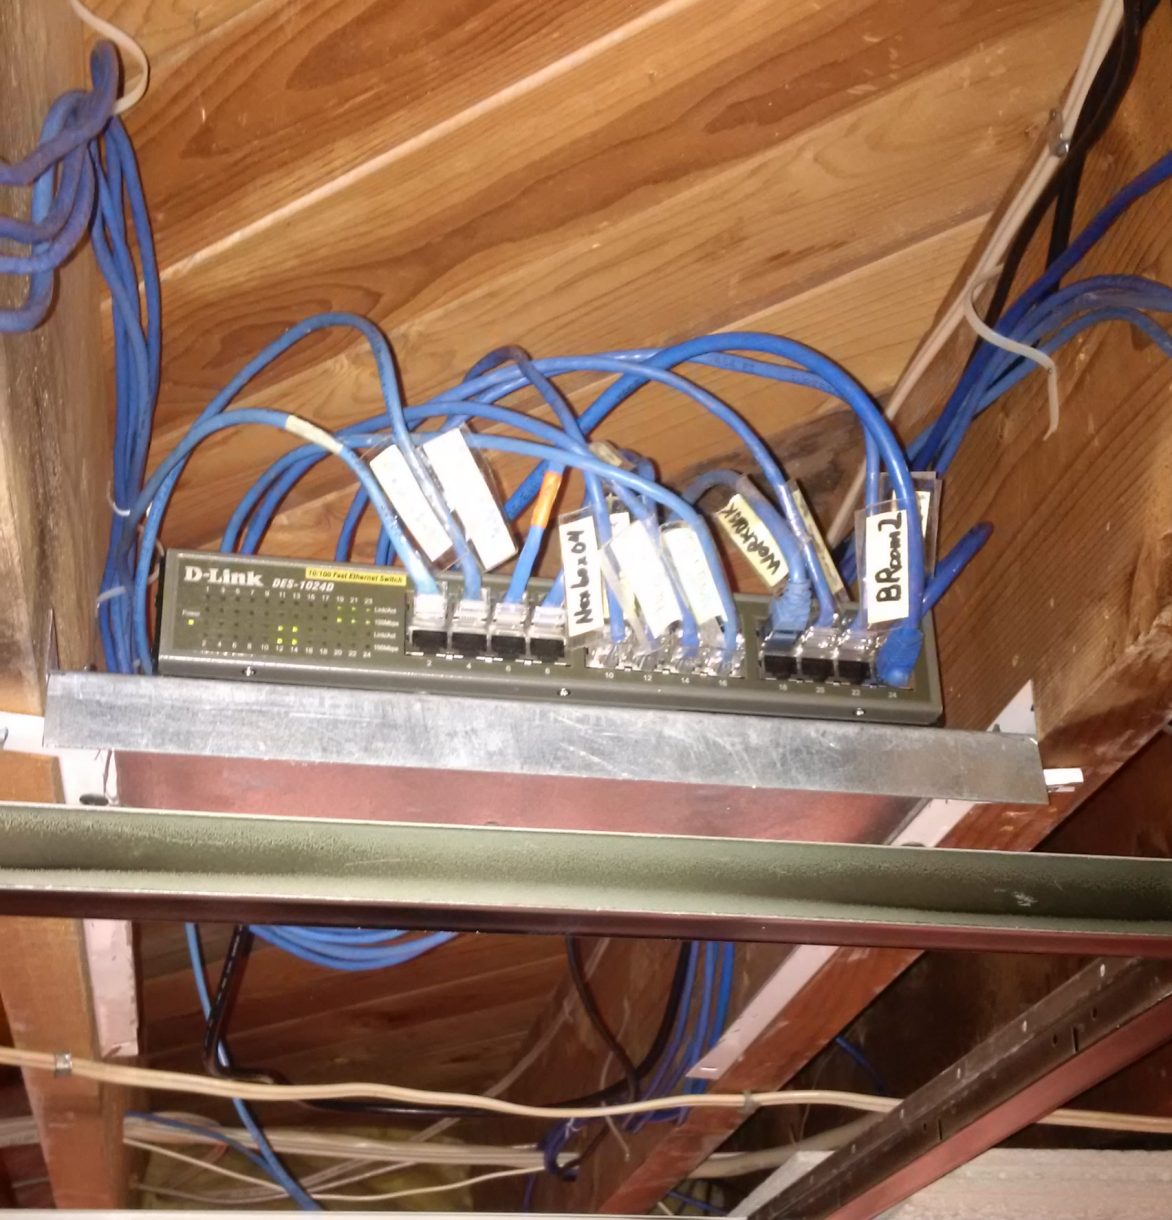
Then came hooking it all up and the test to see that it worked, and I began to see how the labelling was going to be a problem when bending those lines for placement… and how am I going to do that, by the way? It took some time roaming out int the storm field for lighting to strike, but it did.
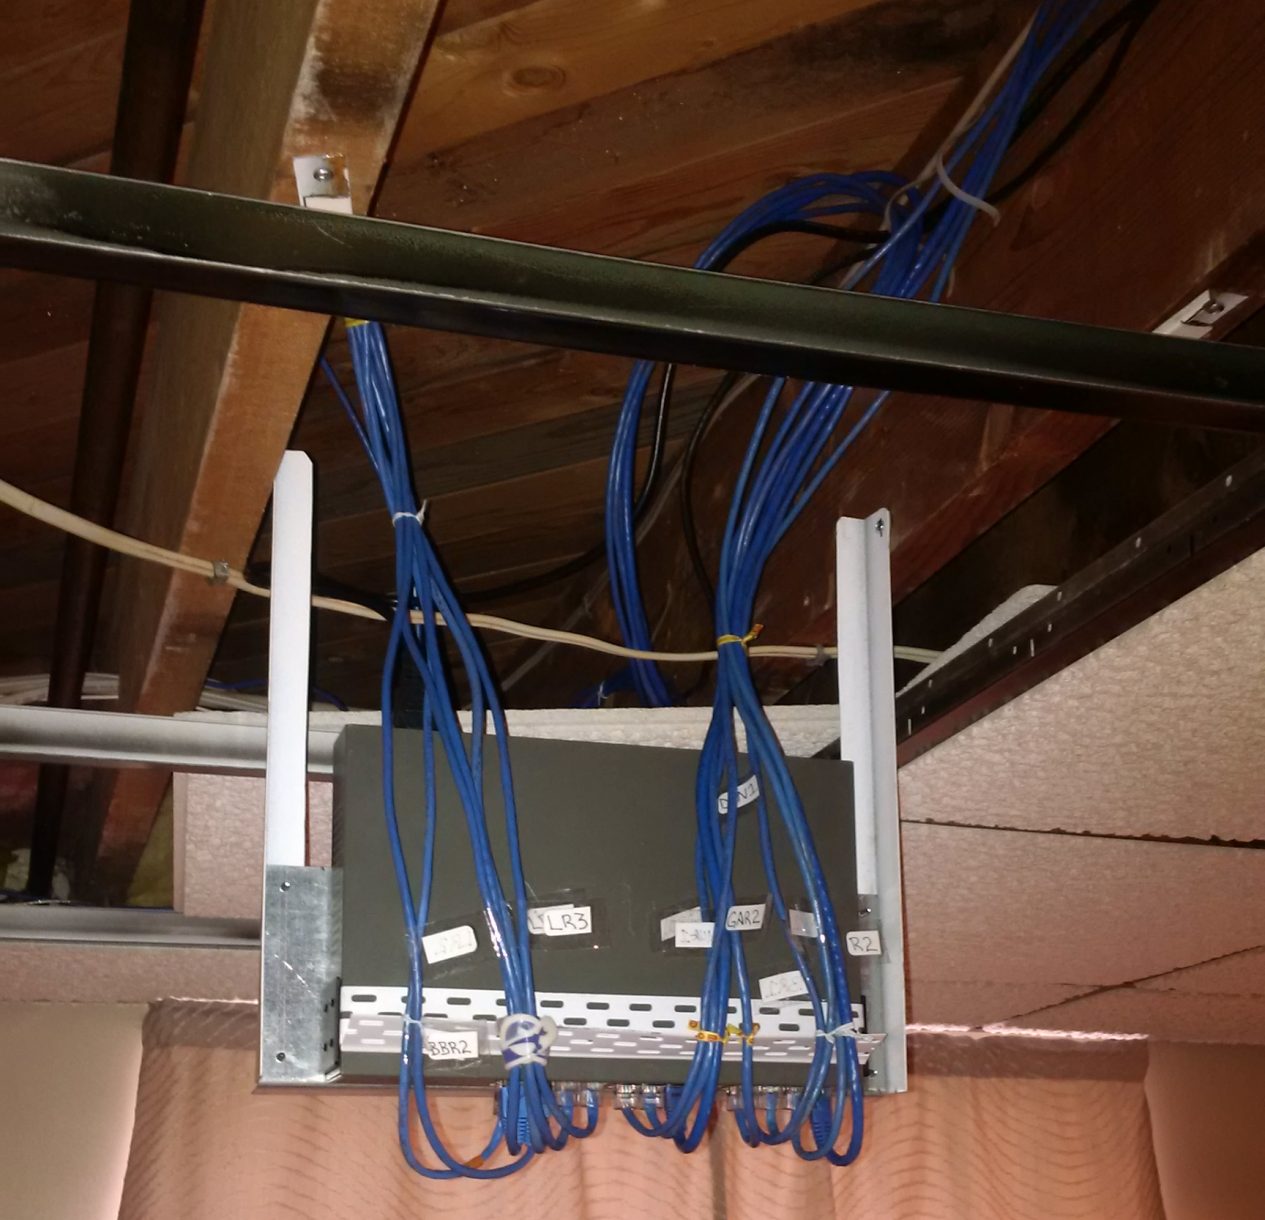
It struck in the form of a piece of drywall corner moulding I had stashed away for God knows how long. With lots of holes for twist-ties, it was easy to shape and work with, so I just snipped the ends, tucked them down, and firmly mounted it between the switch and rack wings. I then changed all the labelling, took the opportunity to cut the hanger arms by 5″ and moved them back from the T-Bar an inch to change the arc. Then it wasn’t tight up against it. Progress in stages…. The line slack was then pulled back and away from the switch, and it dropped down with two “mains” feeding each side.
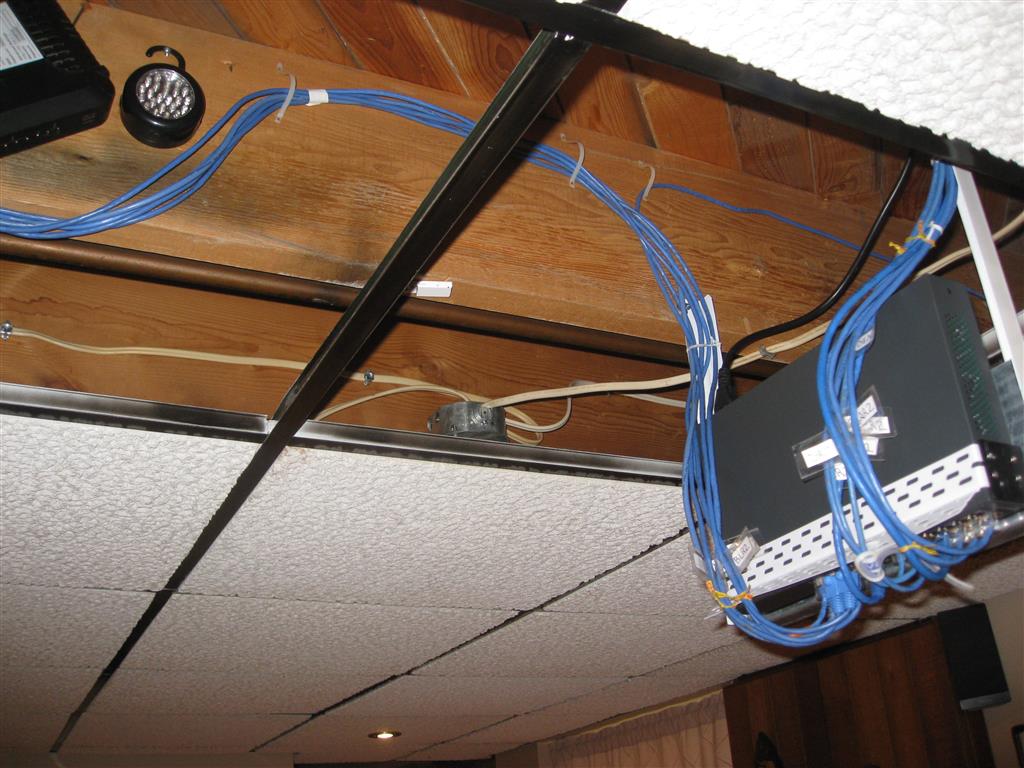
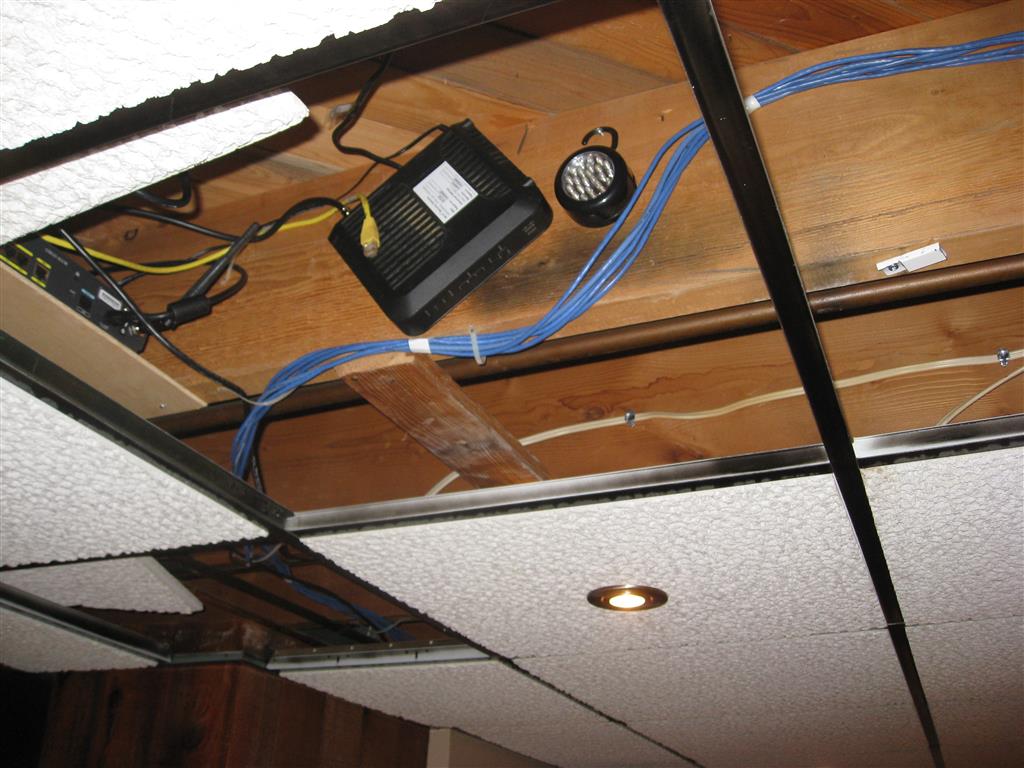
Now it started to look pretty. ![]() Power went to a 4 way outlet already mounted in the ceiling, the first router faces it from the other direction, and the second (Synology 2600AC) is upstairs so the coverage is better. It’s not quite professional looking, but I’ve seen a whole lot worse.
Power went to a 4 way outlet already mounted in the ceiling, the first router faces it from the other direction, and the second (Synology 2600AC) is upstairs so the coverage is better. It’s not quite professional looking, but I’ve seen a whole lot worse.
If ever I need greater speeds, I can change the switch out for a Gigabit switch with little trouble, but that is beyond my needs right now. The two routers will be used to separate my existing network from an IOT network of cameras and other notoriously insecure devices, and the rest remains to be seen.
Not without work and effort, but all in all, this was a success far easier than I thought it was going to be, but as I soon found out, was not the end of the story.
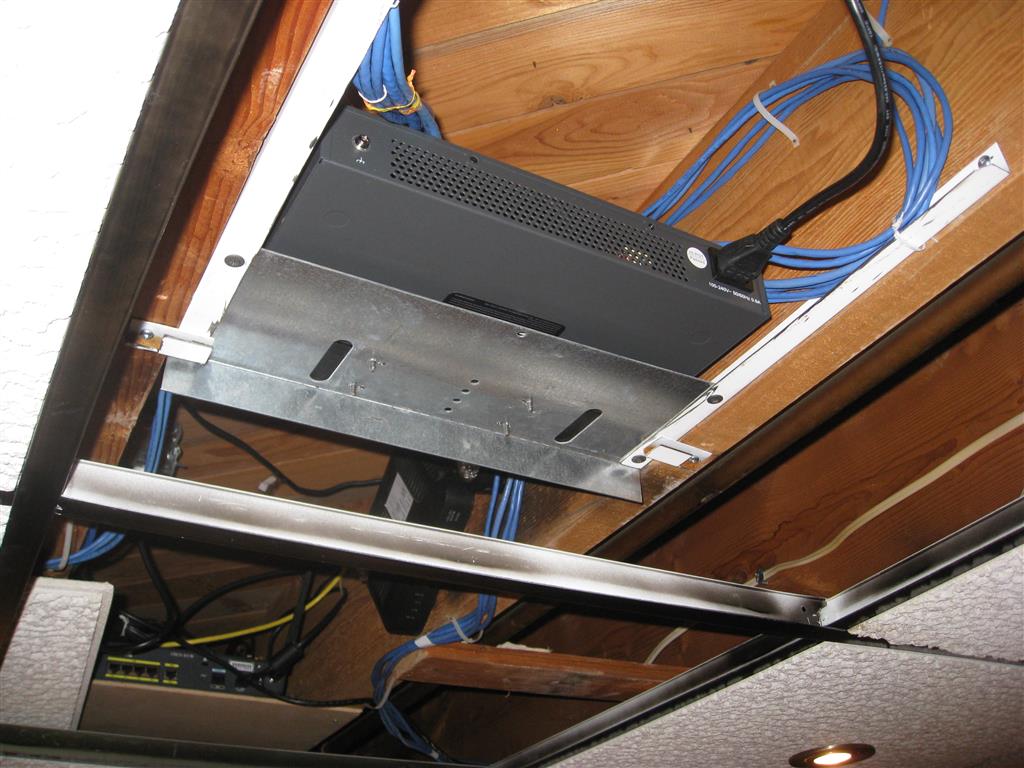
While everything connected satisfactorily, the throughput was jerky and buffered all the time, and upon closer inspection, found that the little Netgear switch I had been using to add ports up until now was actually a gigabit switch. Who knew? The 10/100 switch was never going to the the job, and just had to go.
So, I ordered a gigabit switch to replace it, put the old system back in place and awaited its arrival.
The new switch is pretty much exactly the same as the old one. I had to renovate the old rack mounts to fit the new bolt pattern, and some other adjustments not worth mentioning, but again I took the opportunity to pretty it up some more, removing annoying tangles and overlaps further back out of view.
I’ll remove the old router eventually. For now it’s a good place for it, and if I ever need to expand my coverage, it’s there for that. Otherwise, this Cisco 851W was a faithful workhorse right up until it was decommissioned, but always an utter bitch to configure.